Glass Gem Magnets

glassgems01

You know those glass gems they sell in bags at craft stores (even the dollar store, where I found mine). They come in all sorts of colors and look neat, but I never know what to do with them other then use them in a bottom of a vase or fishbowl. In high school I painted the backs of the clear ones and used them as cool looking tacks for hanging pictures/posters, but after a short while the paint would peal and the tacks would fall off. I was sort of sad because they did look really neat so when I saw the bigger sized ones at the dollar store I had a great idea. I figured these would be big enough to see pictures through if I printed them small enough. So I set to work coming up with some ideas.

This is what I came up with!
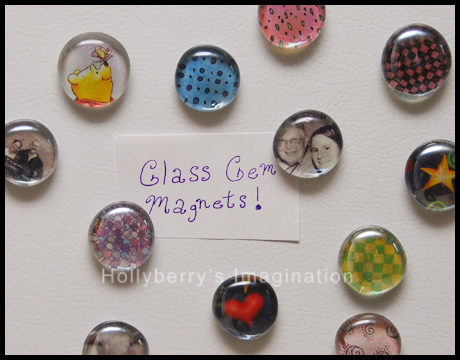
glassgems02

Glass Gem Magnets

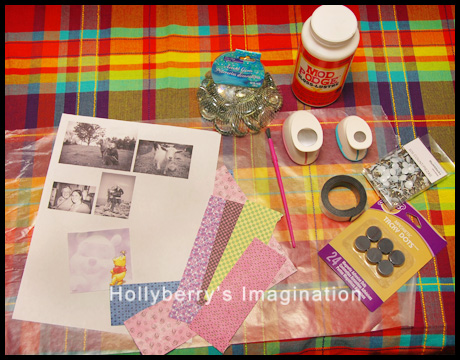
Supplies: larger glass gems with one side flat (just over an inch in diameter), small pictures printed on regular paper or some pretty scrapbook paper, circle punch (or scissors), magnets (you could try tacks on smaller gems), super glue (optional), modge podge, and a small paint brush.

glassgems03

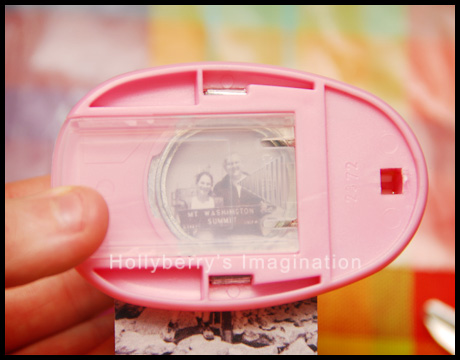
The punch I used was for a 1″ circle which fit perfectly on my gems flat sides. I flipped the punch over so I could choose where the picture or design would cut. If you don’t have a punch, simply trace out your gem on the paper and cut it out slightly smaller.

glassgems04

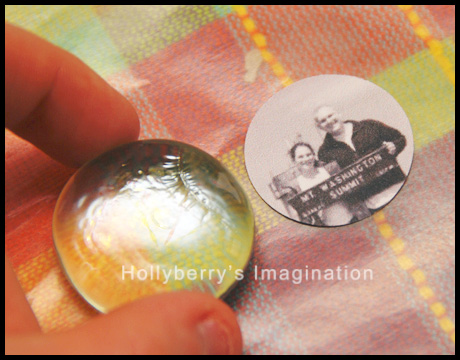
Be careful with the gems that have scratches or cracks on them. Test them over your pictures first to see if it will show up at all. I found cracks like the one above were very noticeable. Luckily there were only a few like that, so i just set them aside.

glassgems05

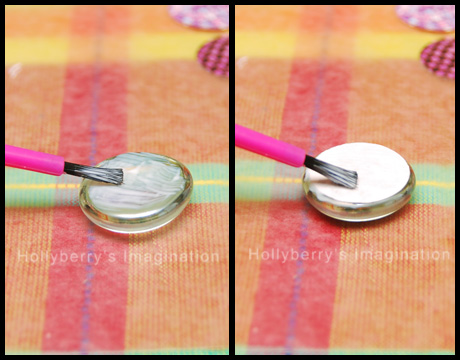
Once all your pictures or designs are all punched (or cut) out, it is time to get out the modge podge! First I painted a little on the gem’s flat side and then carefully placed the pictures face down on it. Smooth it out a little so there are no wrinkles or bubbles. Then for a little extra security I painted some more modge podge over the back of the pictures going slightly over the edges. Let them dry for about 15 minutes or so.

glassgems06

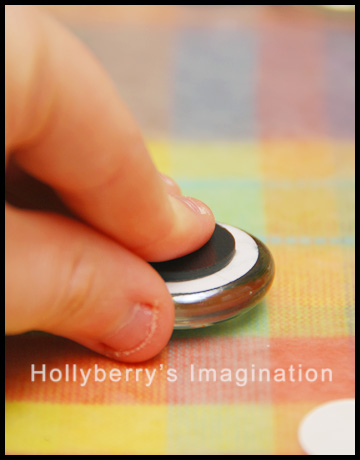
To adhere the magnets I used super glue.  The magnets were the kind with adhesive on the back, but again I like to make sure everything is secure and not going to fall off in a few days. So hold a little pressure on each magnet for about 30 seconds.

glassgems07

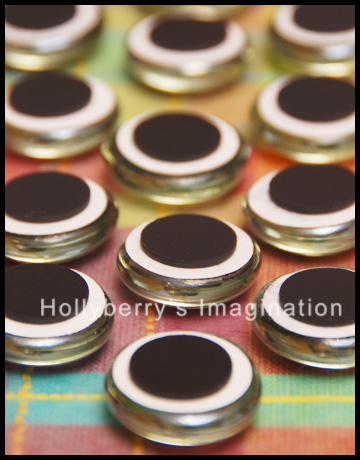
Even though they dry fast I like to let sit for a few minutes before testing them out on the fridge.

glassgems08

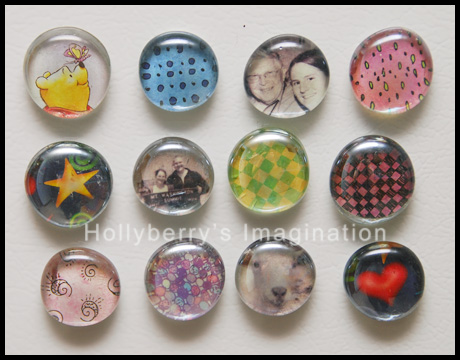
That’s it! You now have a cute little collection of magnets to give away as gifts, or display masterpieces of the fridge!

-Holly

Enhanced by Zemanta

Clothespin Magnets

My Co-worker was looking through her desk drawer and found a clothespin. After a few minutes of us trying to figure out how it could have gotten there, she decided she wanted it to be a magnet. I happen to know that she loves the color purple so I told her I could paint it purple for her and find a magnet. Well, she also has a love of unicorns and therefore decided if I went to the trouble of painting it, I might as well draw a unicorn face on it. Thus, 5 new clothes pin magnets were created.


Supplies:

Clothespins, acrylic paints, paint brushes, puffy paint (usually used for fabric), newspaper (disposable table covering), magnetic tape, super glue, small clamps (I like to use small binder clips, cheaper and very effective)

Gather all your supplies and cover your workspace with newspaper or some other disposable cover that will protect it from any stray paint. To keep my paint brushes from drying out and easier to clean I also like to keep a jar of water on the table.

Paint your clothes pins with 2 coats of an acrylic paint of your choice. Allow at least 10-15 minutes of drying time between coats. After second coat, allow to dry again at least 10-15 minutes.

Now using the puffy paints, create some designs on 1 side of the clip. Leave one side completely flat for the magnet to attach to later. Allow the puffy paint to dry for 30-60 minutes, or until it is dry to the touch. They should be close to completely dry or your designs will get smudged!

Here are my 5 designs drying. While they finish drying, get you magnet, glue & clamps ready. Cut the magnet to fit each of your clips. In my case the magnet was about 1″ wide so I cut 2 1/2 ” strips and cut those in half the long way to make two 1/2″ strips.

This type of magnet is suppose to be peel and stick, but seeing as these clips will be used to hold things I find that it is usually best to add some glue to them, just to be sure.

I dab a few small drops of glue over the strips of magnet.

I press my clothes pins firmly down on the magnet and hold it there for a minute or two.

Use some small clamps (or binder clips in my case) to hold the magnet in place while it continues to dry. Leave it to dry for 15-30 minutes.

And there you have it! I use these magnets of my fridge to be ready to hold notes, photos, or even to close a bag of chips! Also, they are great at work if you have any space in your office that could use some nice decorative magnets that are mighty handy to hold notes or documents!


Please comment and share!

-Holly