Woodchip Bugs!

woodbugs09

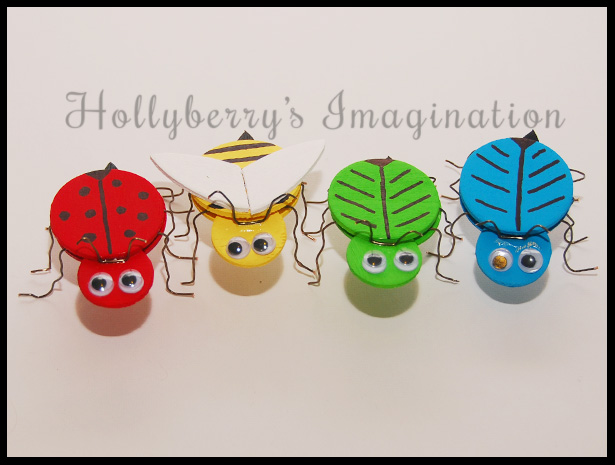
It’s spring! At least, it’s trying to be. Today is not working out to well weather-wise here in New England. As the warmer weather does start to come around, so do the bugs! These bugs however, are the kind that don’t bite and you might even invite to a picnic. They are very simple to make and so darn cute!

Supplies: Wood chip pieces from a craft store (you will need different size circles and teardrop shapes),  some wire (18-22 gauge seems like it works best), Pliers (the kind that will cut the wire too), Acrylic paint, Paint brushes, a black Permanent marker, Googly eyes, and some glue!

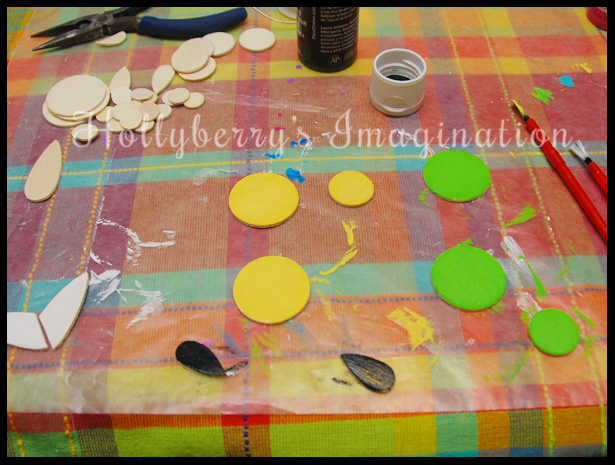
woodbugs01

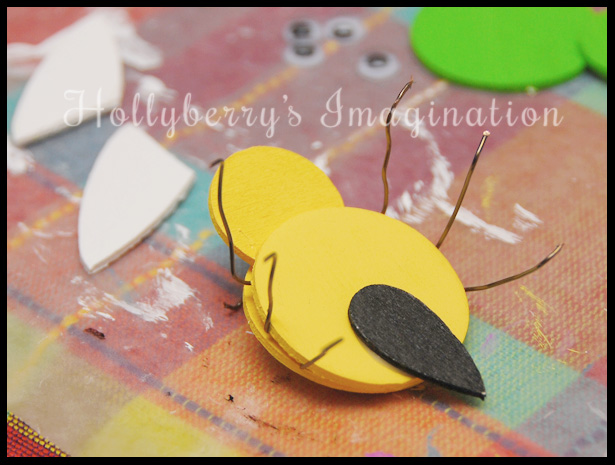
Pick out the pieces you need for whichever bug you choose to make. Actual size of these shapes doesn’t really matter. The large ones I used for the bodies were about 1 1/4″. For the bee’s wings I clipped a corner of a teardrop shape so it looked a little more wing-like. Then start painting them whatever color you want your bug! I recommend 10 minutes of drying time before painting the opposite sides so they don’t stick to anything. Also, I found that two coats looked far better then just one.

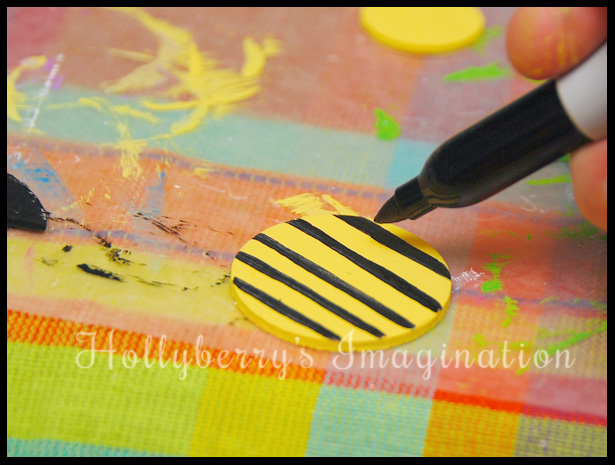
woodbugs02

Once your top piece of your bug is completely dry, use a black permanent marker to draw a design on its back. For the bee I made stripes and the ladybug I made dots.

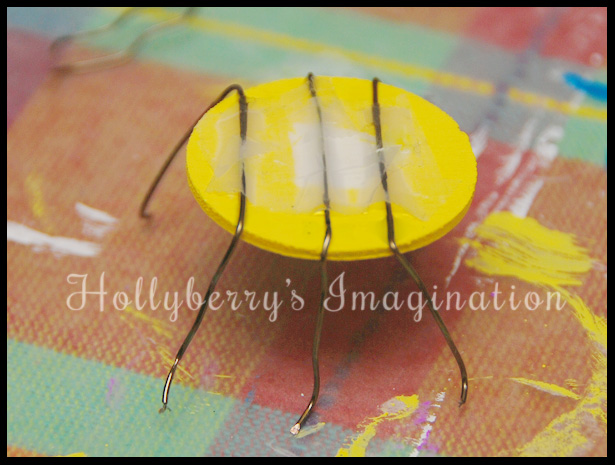
woodbugs03

Next, I start putting the bug together. I found this part to be rather tricky. I cut out 3 pieces of wire to sit over the bottom side of the body for the legs. (Note: I used 18 gauge wire, be careful not to just buy any wire. You want one that is easy to bend, but stiff enough to hold up your bug)  I wanted to just glue them all on, but that really didn’t work out so well… or at all for that matter. So instead I used a little tape to hold them all on before I could get the glue on. (another option could be a hot glue gun if you are not involving kids in this project.)

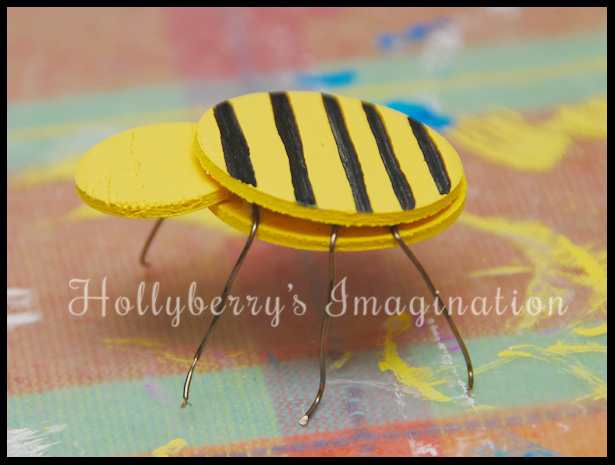
woodbugs04

Then I put plenty of glue on his back and put his head and then his back top piece on. I did end up needing some clamps (clothespins, or something similar) to hold some of them together while they dried. Once they were dry, they were standing up pretty good!

woodbugs05

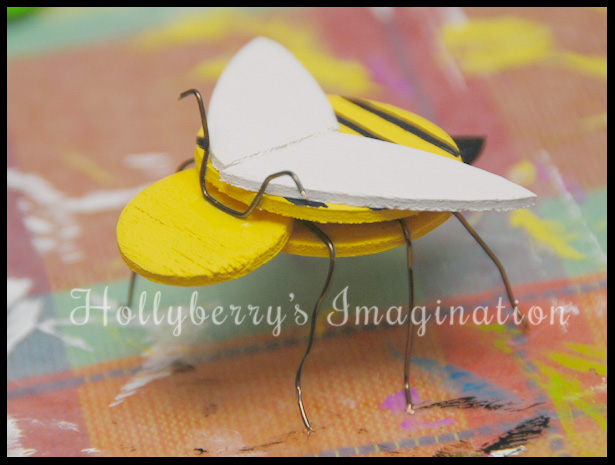
Now you want to flip your bug over to glue his tail on. Let it dry and then help him back on his feet!

woodbugs06

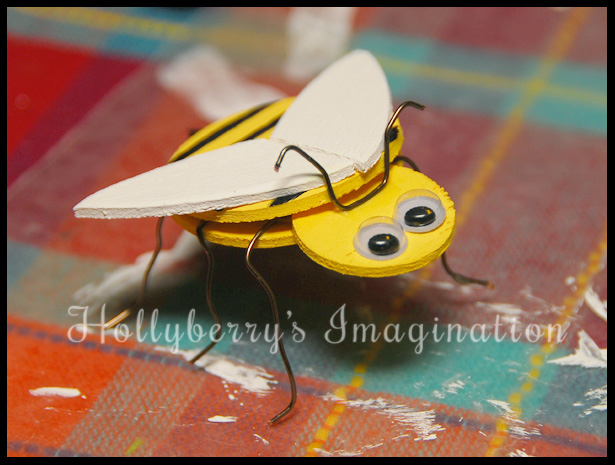
Glue his wings on his back right behind his head. Also make some him an antenna out of wire and glue it on. I used super glue, because that is the only thing that seemed to work for that part. Regular craft glue proved to be too slippery and dry too slow and I didn’t want a large blob of hot glue on his head.

woodbugs07

Finally give him some cute little googly eyes!

woodbugs08

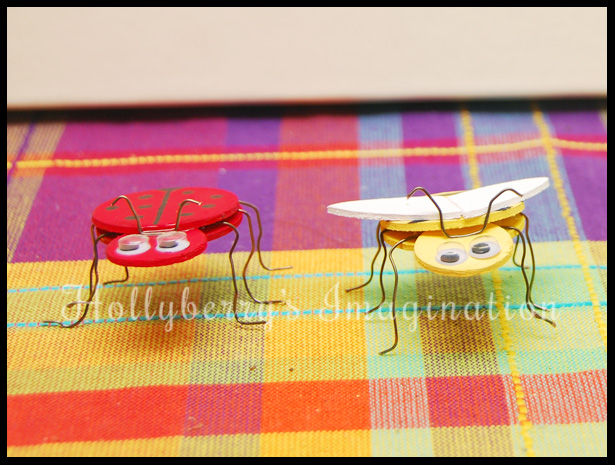
My finished bugs are about 1″ off the ground and 1 1/2″-2″ wide.

woodbugs09

These would be great projects to make with kids, give away as little gifts or even party favors!

Please feel free to share any bugs you create with wood chips, I would love to see them!

-Holly


Christmas Light Photos

In the spirit of Christmas and seeing everyone taking pictures of all their Christmas decorations they are so proud of this time of year I thought I would do my first Photo Tutorial on taking pictures of Christmas lights.

Christmas lights can be a little tricky to get to look nice in a photo.  You finally finish decorating and you are so proud of how it looks that you want to capture it forever or share it with everyone. Nothing is more disappointing then taking a bunch of photos of your fine holiday accomplishment only to find that none of them even come close to what you envisioned showing off to your friends. I am going to explain my way through 4 common, undesired,  outcomes of Christmas light photos.

1. TOO DARK & ONLY A FEW DIM LIGHTS VISIBLE

Fix: Your shutter speed is too fast. Slowing it down will make the lights show up better. If you are using a point & shoot (not an SLR) camera, what you want to do is use the “night” or “fireworks” setting. However, with any camera you need to be careful to make sure it is on a tripod on set on a table or you are going to get a blurry version of what you are looking for.

2. TOO BRIGHT, LOOKS LIKE YOUR TREE IS ON FIRE

Fix: Your shutter speed is too slow or your f-stop is too low. First try speeding up your shutter speed. (faster = less light is recorded on the image) Another thing you can try is to closing your f-stop some. A low number is allowing a lot of light to record, set it to a higher number and it will allow less light to record on the image. As with all of these suggestions, when taking these type of light pictures, always use a tripod or set the camera on something stable like a table.

3. WRONG COLOR CAST & LIGHTS BARELY VISABLE

Fix: Turn off all lights except the ones you want in the picture. If you want the tree lights to show up well, turn off the overhead lights. In the above picture, the color temperature (yes light has different colors & temperatures, perhaps I explain in another blog?) of the different lights in the room are fighting and the overhead lights are winning over the tree lights. If your camera has white balance settings, try using the “tungsten” or “incandescent” settings.  Remember to keep your camera steady with a tripod or table!

4. JUST PLAIN BLURRY

Fix: This is the easiest photo to fix and yet one of the most common types of Christmas light photos. If you have read thus far, I hope you know the answer to this one! Try using a tripod or table to steady the camera. Anything around you can work as a tripod, it doesn’t have to be fancy. Try a pile of books, a chair, or steadying the camera against a wall. The shutter speed is slow enough that the slightest movement, which often we can’t even feel or see, the camera does feel and you get a picture like the one above.


Hopefully with a little practice and patience you can get the very look you envision for your holiday photos!


Please comment, share, & enjoy!

-Holly