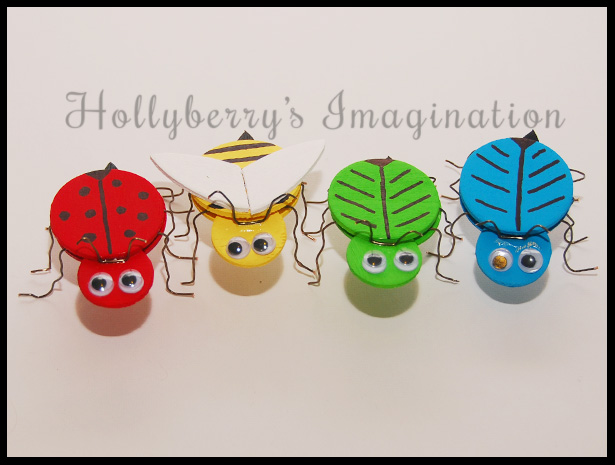
It’s spring! At least, it’s trying to be. Today is not working out to well weather-wise here in New England. As the warmer weather does start to come around, so do the bugs! These bugs however, are the kind that don’t bite and you might even invite to a picnic. They are very simple to make and so darn cute!
Supplies: Wood chip pieces from a craft store (you will need different size circles and teardrop shapes), some wire (18-22 gauge seems like it works best), Pliers (the kind that will cut the wire too), Acrylic paint, Paint brushes, a black Permanent marker, Googly eyes, and some glue!
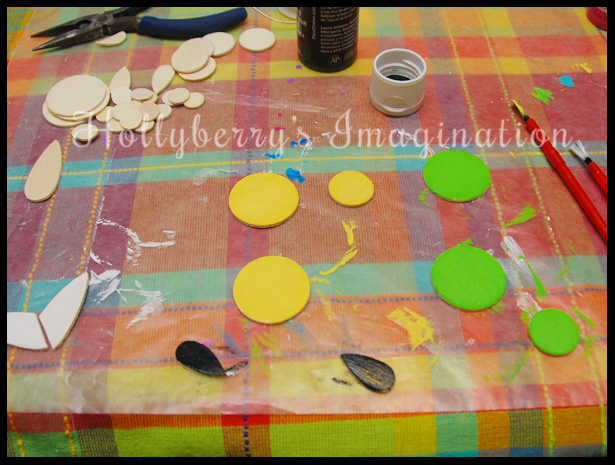
Pick out the pieces you need for whichever bug you choose to make. Actual size of these shapes doesn’t really matter. The large ones I used for the bodies were about 1 1/4″. For the bee’s wings I clipped a corner of a teardrop shape so it looked a little more wing-like. Then start painting them whatever color you want your bug! I recommend 10 minutes of drying time before painting the opposite sides so they don’t stick to anything. Also, I found that two coats looked far better then just one.
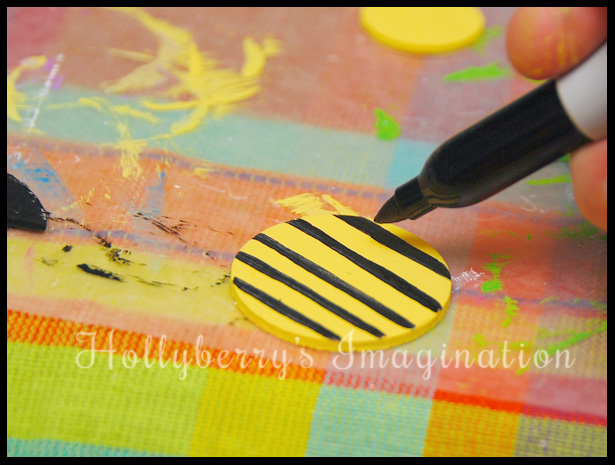
Once your top piece of your bug is completely dry, use a black permanent marker to draw a design on its back. For the bee I made stripes and the ladybug I made dots.
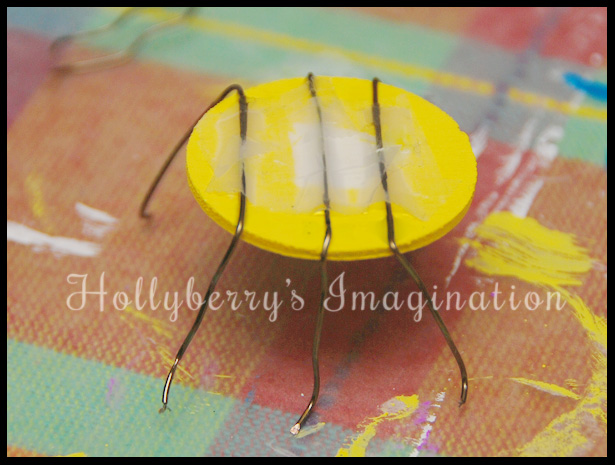
Next, I start putting the bug together. I found this part to be rather tricky. I cut out 3 pieces of wire to sit over the bottom side of the body for the legs. (Note: I used 18 gauge wire, be careful not to just buy any wire. You want one that is easy to bend, but stiff enough to hold up your bug) I wanted to just glue them all on, but that really didn’t work out so well… or at all for that matter. So instead I used a little tape to hold them all on before I could get the glue on. (another option could be a hot glue gun if you are not involving kids in this project.)
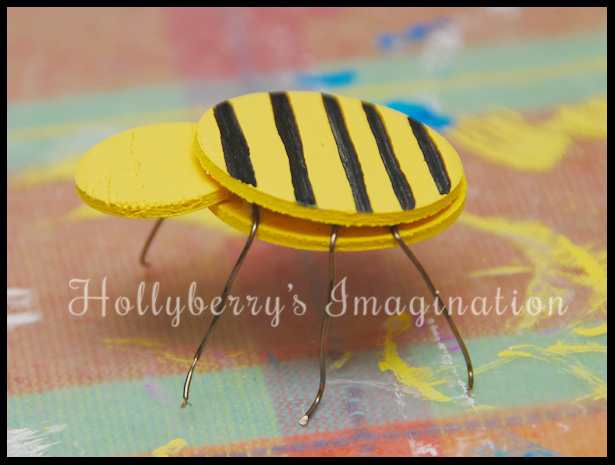
Then I put plenty of glue on his back and put his head and then his back top piece on. I did end up needing some clamps (clothespins, or something similar) to hold some of them together while they dried. Once they were dry, they were standing up pretty good!
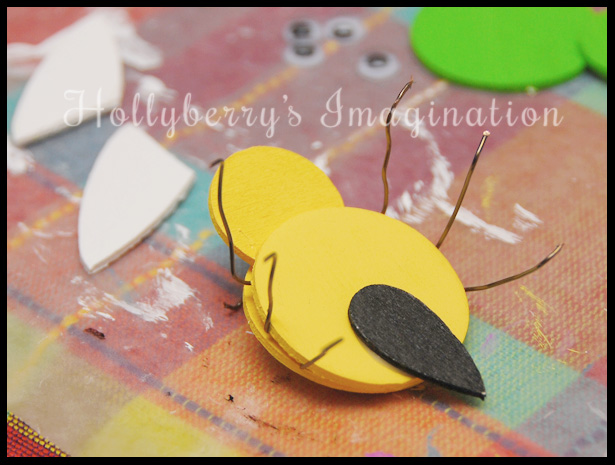
Now you want to flip your bug over to glue his tail on. Let it dry and then help him back on his feet!
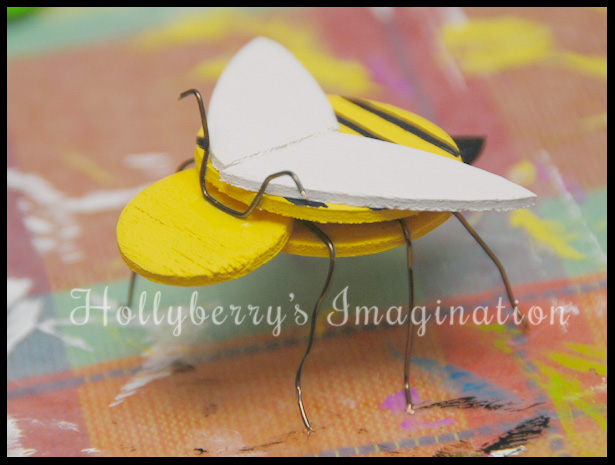
Glue his wings on his back right behind his head. Also make some him an antenna out of wire and glue it on. I used super glue, because that is the only thing that seemed to work for that part. Regular craft glue proved to be too slippery and dry too slow and I didn’t want a large blob of hot glue on his head.
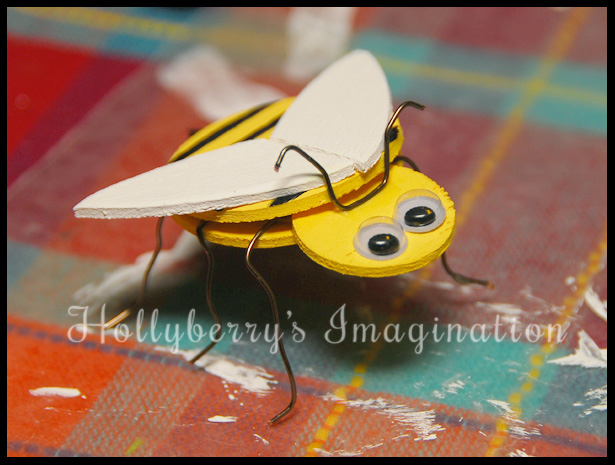
Finally give him some cute little googly eyes!
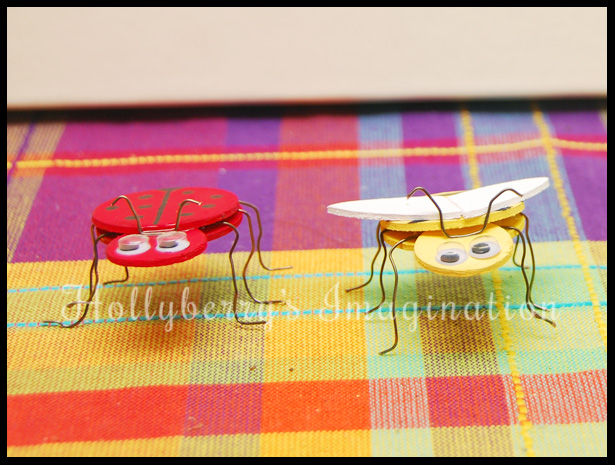
My finished bugs are about 1″ off the ground and 1 1/2″-2″ wide.
These would be great projects to make with kids, give away as little gifts or even party favors!
Please feel free to share any bugs you create with wood chips, I would love to see them!
-Holly